How to post an article
This page walks through uploading articles with proper layouts and formatting.
1. New Article Creation & Set Up
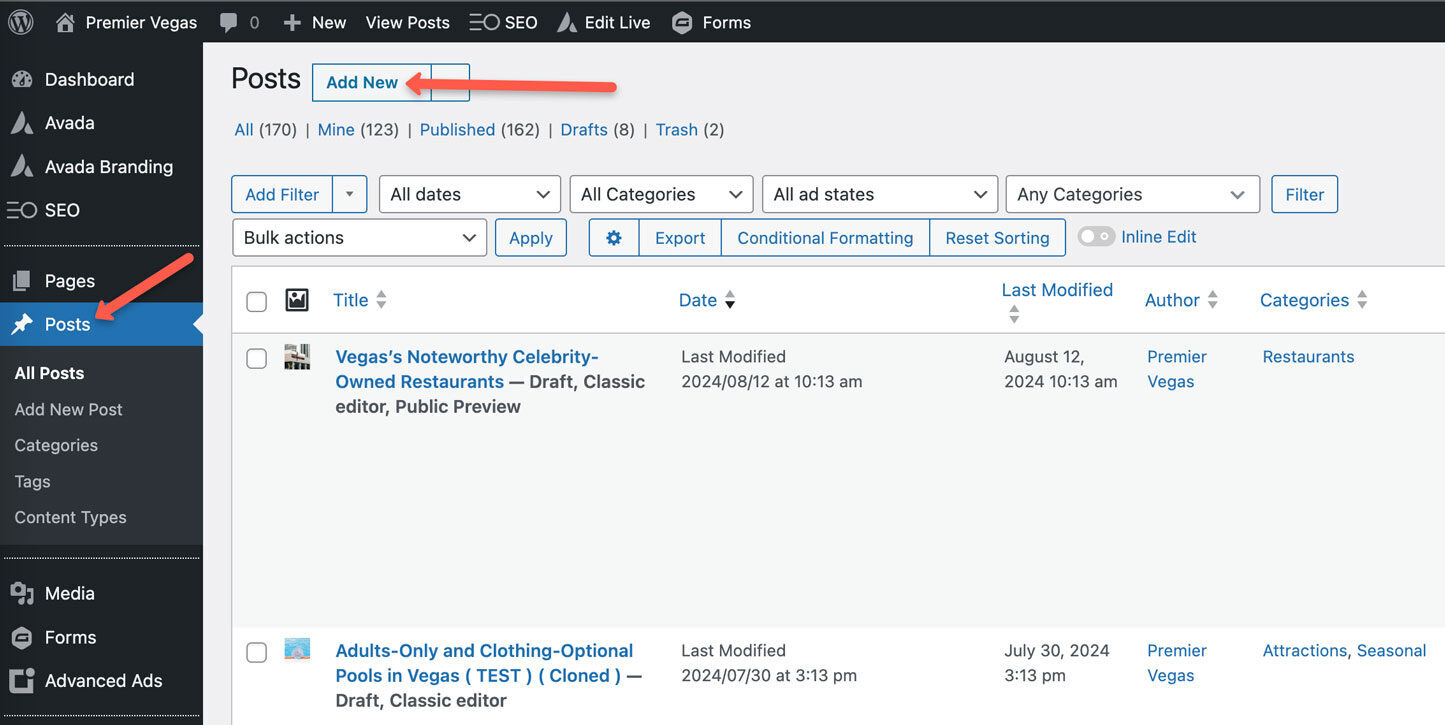
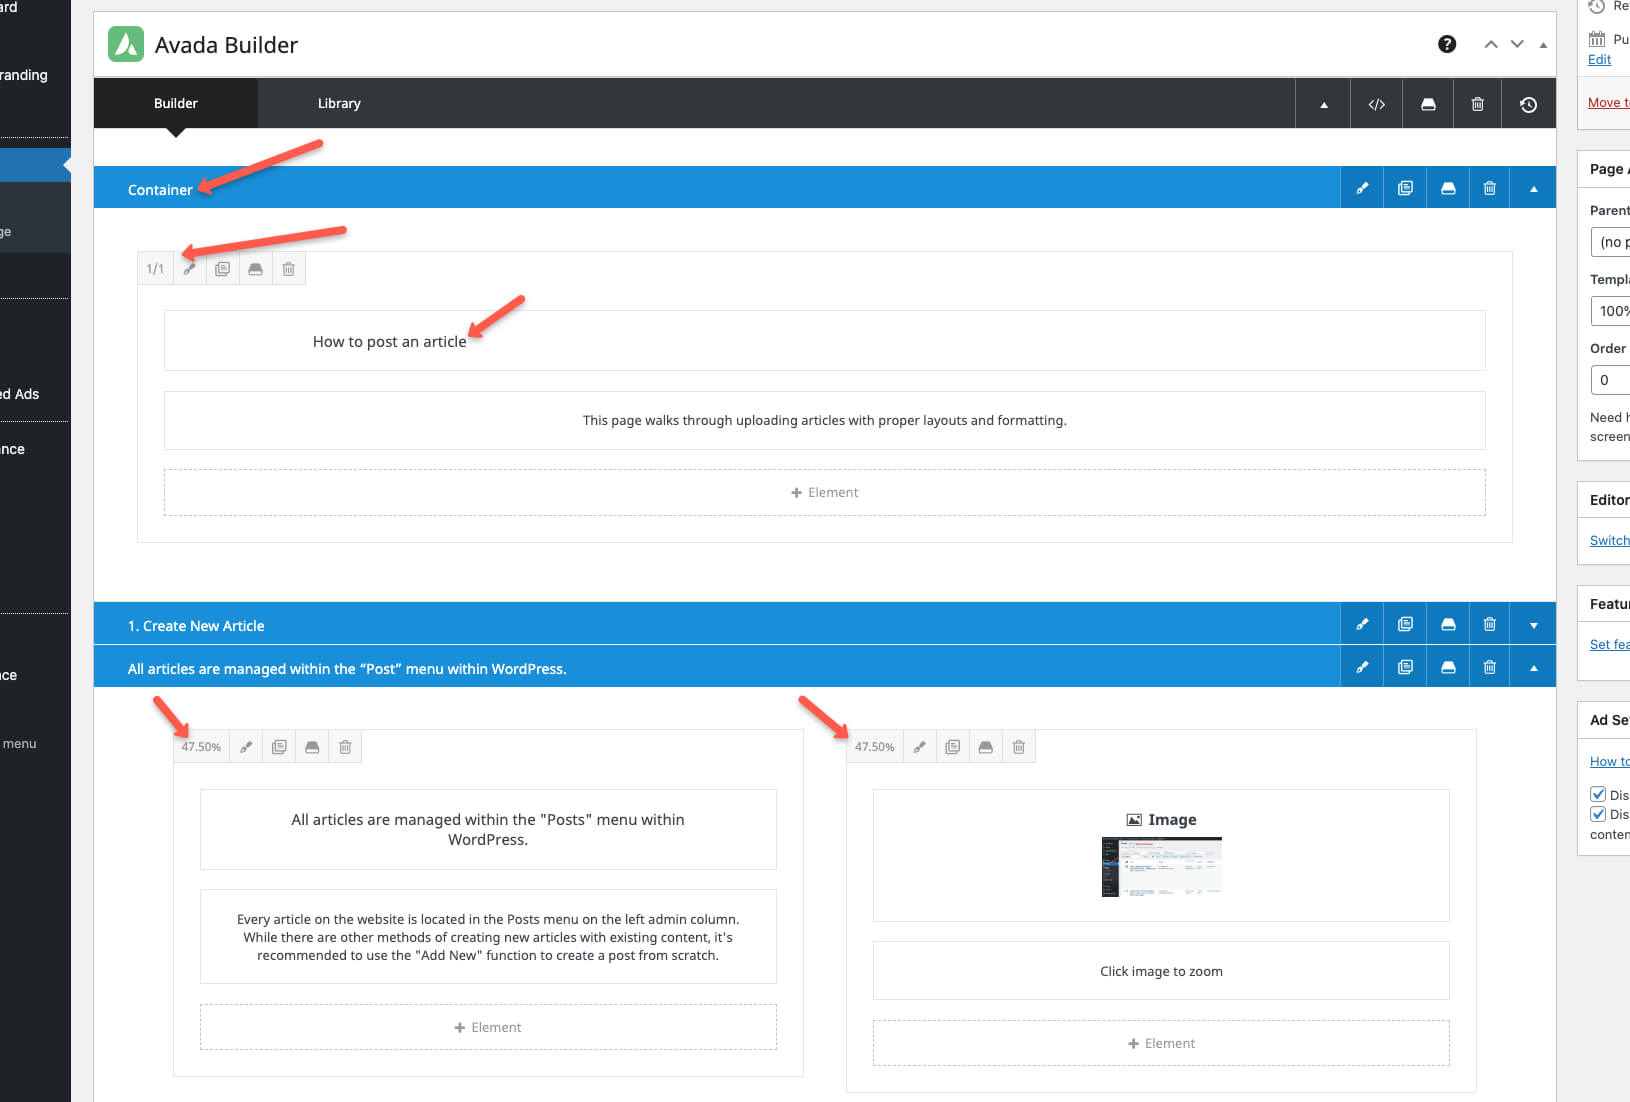
All articles are managed within the “Posts” menu within WordPress.
Every article on the website is located in the Posts menu on the left admin column. While there are other methods of creating new articles with existing content, it’s recommended to use the “Add New” function to create a post from scratch.
Click image to zoom
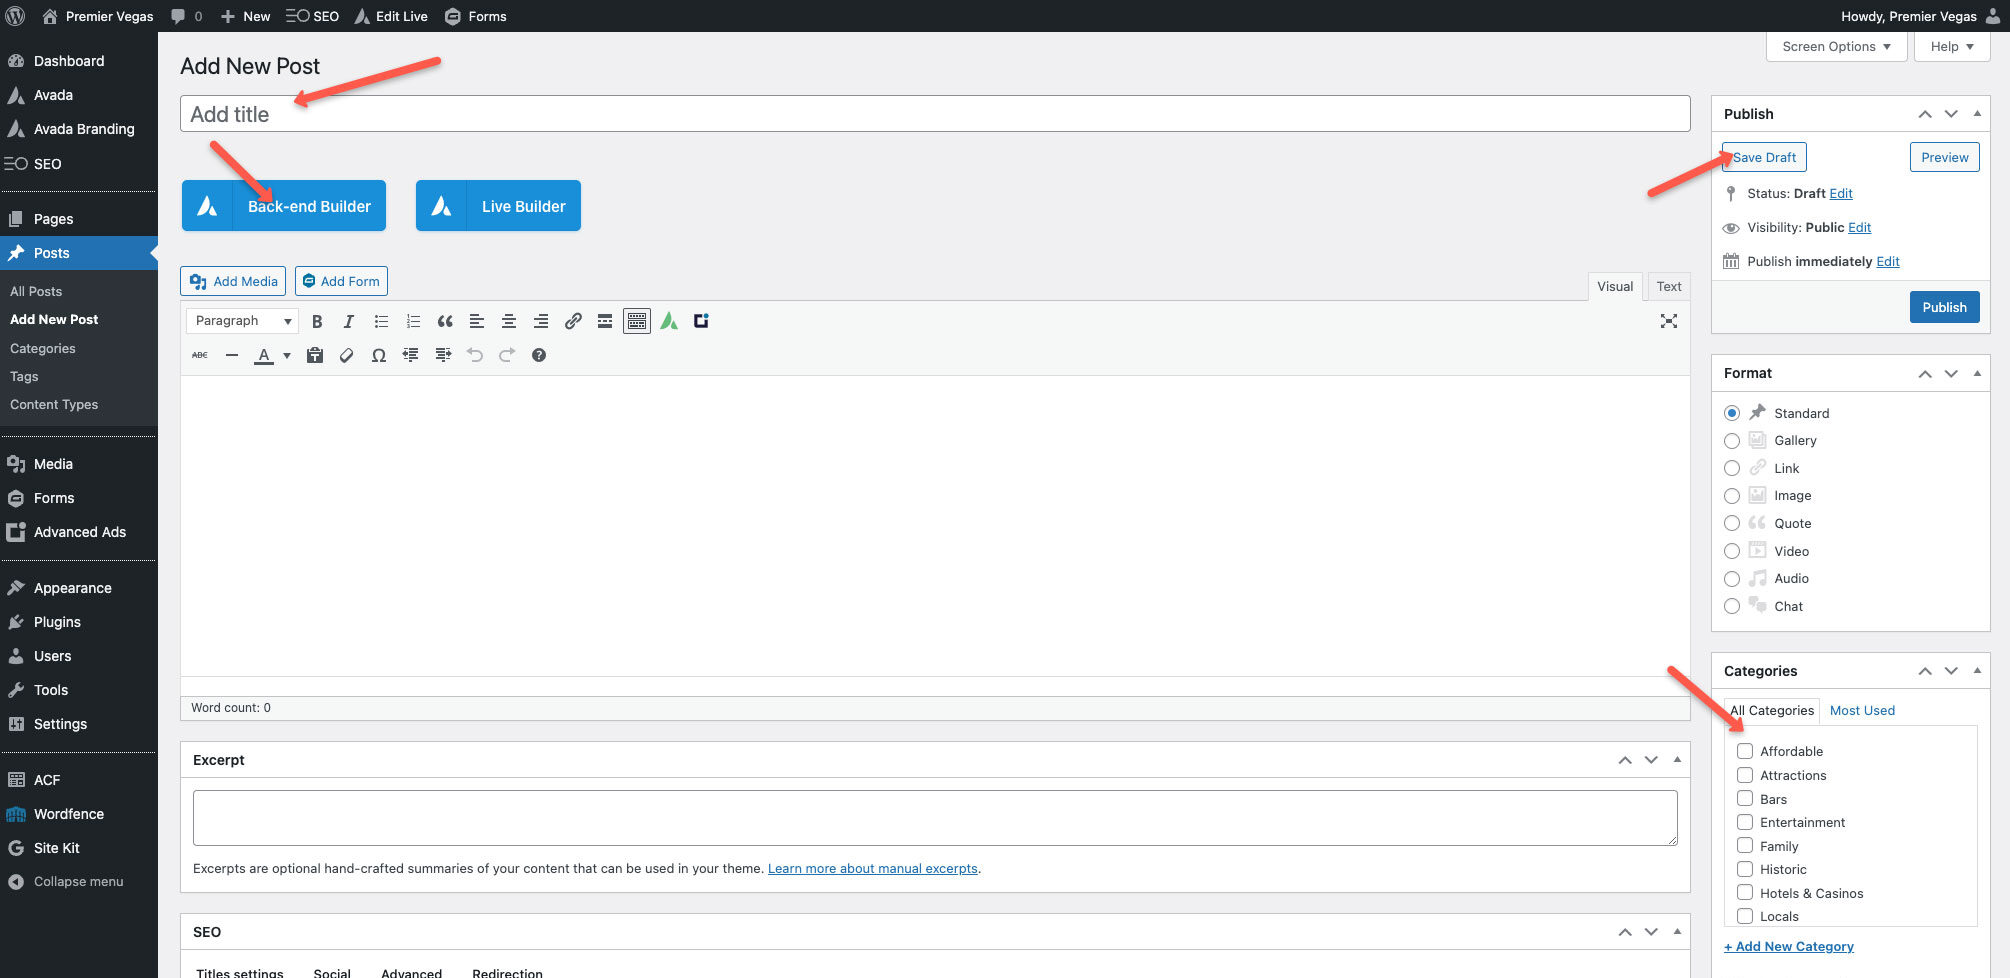
Fill in the article Title and Category, activate Avada and SAVE AS DRAFT
The first thing you should do is fill in the article title in the Title field and assign the appropriate categories. These should be provided with the Google doc content.
Next, click the blue “Back-end Builder” button to activate Avada’s page builder.
Lastly, make sure you SAVE AS DRAFT. The publish button will push the article live, which we only do after the finished article has been internally reviewed.
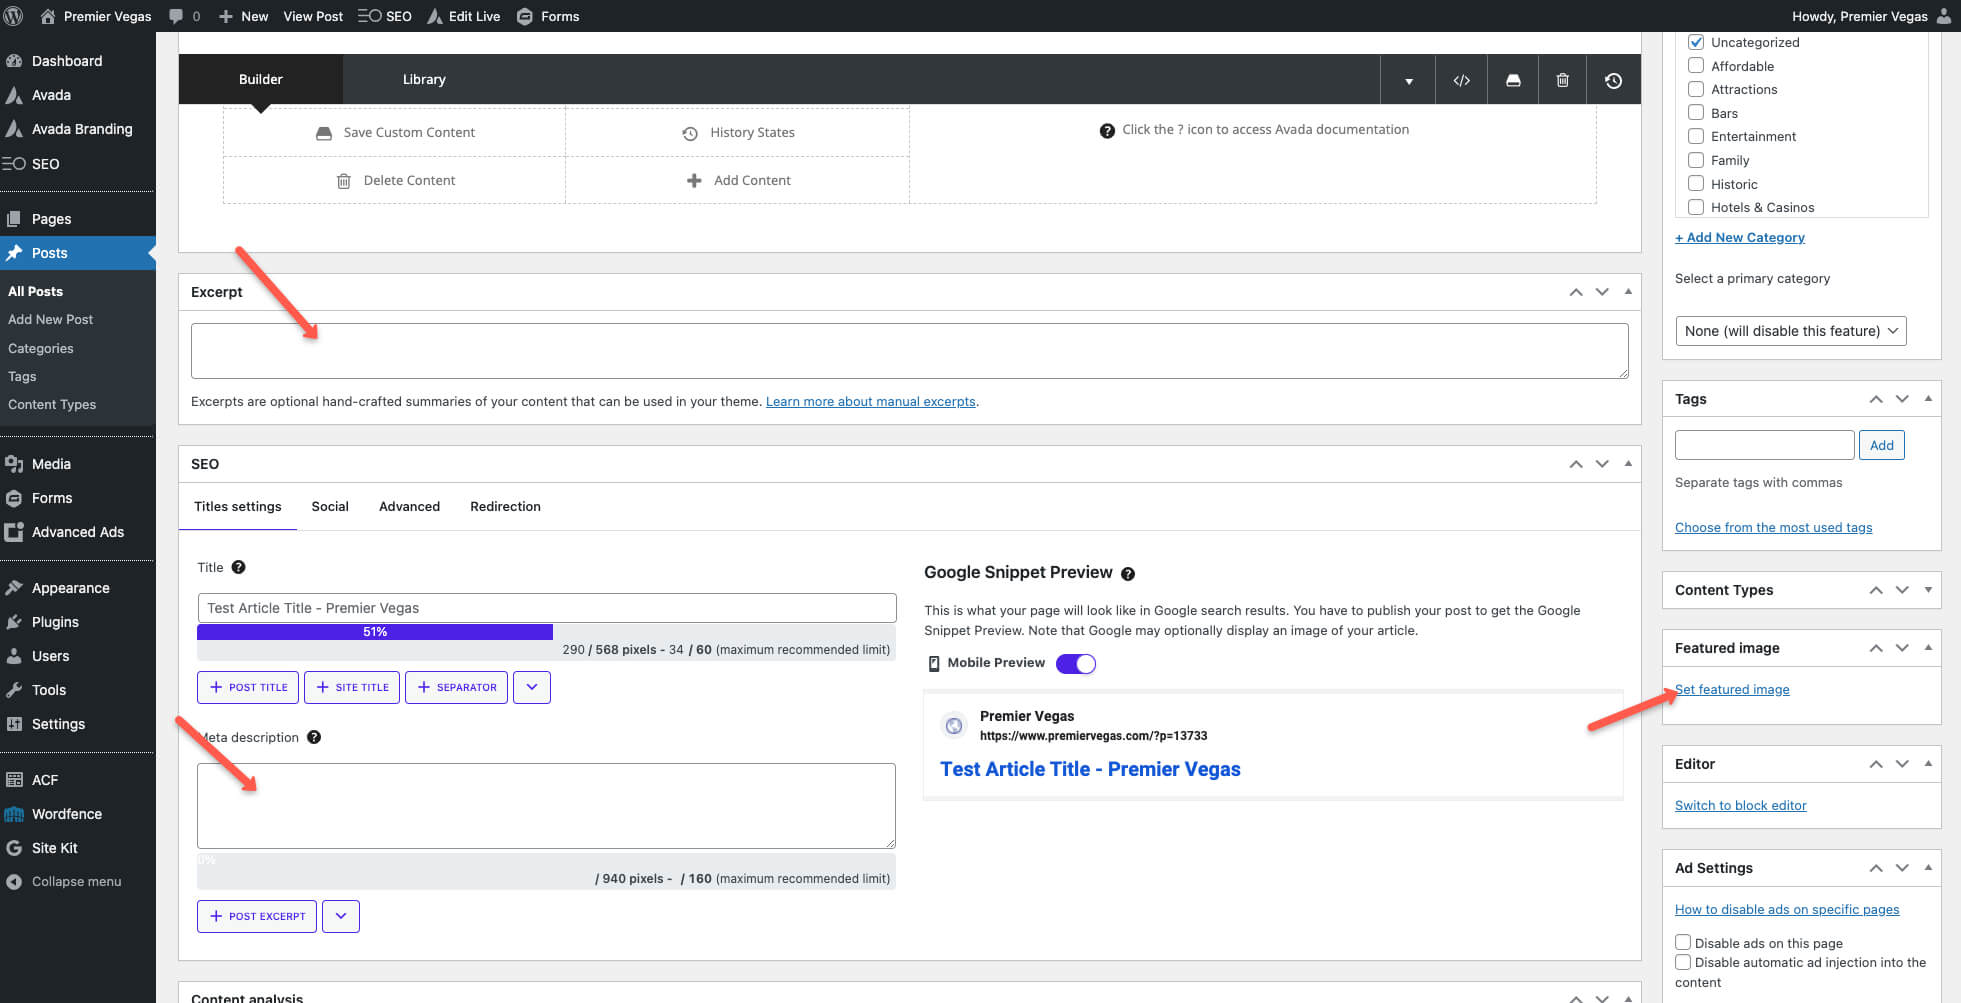
Add the Featured Image, article excerpt and meta description
The “Featured Image” is the primary image in the article’s header. Click the Set Featured Image link highlighted in the screenshot and upload the new images through WordPress’ Media Library.
All images should be provided within Asana by the team and labeled accordingly.
Next, use the “Meta” listed in the Google Doc to fill in the Excerpt and Meta Description fields shown in the screenshot. The SEO Title will be filled in automatically based on the article title.
2. Using the Avada Builder to Add Content
The Basics
Avada utilizes a page builder to help easily add content and create page layouts. These layouts follow the basic structure:
- Containers are the top-level wrapper for each section (blue bar)
- Columns always live within containers and can be used to create multi-column article layouts
- Elements always live within Columns and are where we add the actual content of the articles.
Click image to zoom